How to use Online Designer with FastReport Open Source
Probably,
you are already aware of the advent of the open source report generator
FastReport Core. Now you can save on the purchase of FastReport Core if you do
not need exports (in the open version, the list of available export reports is
severely cut).
However, if
we want to use the online designer for FastReport Core, we can purchase it
separately. In this article we will look at the way to use an online designer
with FastReport Open Source.
Let’s create
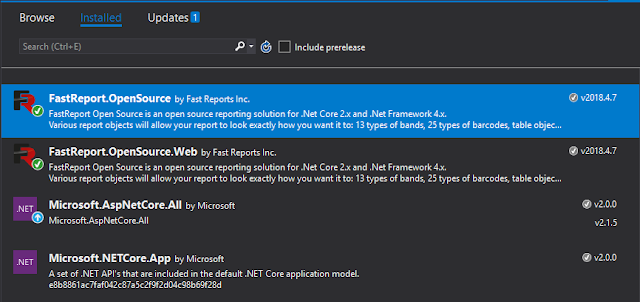
an ASP .Net Core MVC project. First of all, we will install the
FastReport.OpenSource libraries, which can be found in the NuGet repository.
Install two
packages: FastReport.OpenSource and FastReport.OpenSource.Web.
If you have
not downloaded your online designer build, it's time to do it. Do not forget
that you need an assembly for FastReport Core.
Open the downloaded file
FastReportOnlineDesigner- <Your Login> .zip
Drag the WebReportDesigner folder to the
wwwroot directory. And we also need a folder with a report and an xml database
for it. Add the Reports folder. Add a report file Master-Detail.frx and an xml
database file for the report nwind.xml.
Let's go to the Controllers - HomeController.cs.
Add two libraries to the “using” section:
using
FastReport.Web;
using
System.IO;
Edit the Index method:
public IActionResult Index()
{
WebReport WebReport = new WebReport();
WebReport.Report.Load(@"Reports/Master-Detail.frx"); // Load the report into the WebReport object
System.Data.DataSet dataSet = new System.Data.DataSet(); // Create a data source
dataSet.ReadXml(@"reports/nwind.xml"); // Open the xml database
WebReport.Report.RegisterData(dataSet, "NorthWind"); // Registering the data source in the report
WebReport.Mode = WebReportMode.Designer;
// Set the mode of the web object
WebReport.DesignerLocale = "en";
WebReport.DesignerPath = @"WebReportDesigner/index.html"; // We set the URL of the online designer
WebReport.DesignerSaveCallBack = @"Home/SaveDesignedReport"; // Set the view URL for the report save method
ViewBag.WebReport = WebReport; // pass the
report to View
return View();
}
For the
designer, you need to implement a report save method:
[HttpPost]
// call-back
for save the designed report
public ActionResult SaveDesignedReport(string reportID, string reportUUID)
{
ViewBag.Message = String.Format("Confirmed {0} {1}", reportID, reportUUID); // We set the message for representation
Stream reportForSave = Request.Body; // Write the result of the Post request to the stream.
string pathToSave = @"DesignedReports/TestReport.frx"; // Get the path to save the file
using (FileStream file = new FileStream(pathToSave, FileMode.Create)) // Create a file stream
{
reportForSave.CopyTo(file); // Save the result of the query to a file
}
return View();
}
For each
method that returns an ActionResult, you need a different view. For the Index
method, the view is already created by default. Add a new view for the
SaveDesignedReport method. To do this, right-click on the Views / Home folder
and select Add-> New tem and select ASP.Net MVC View.
The contents
of the SaveDesignedReport view will be:
@ViewBag.Message
Index view content:
@{
ViewData["Title"] = "FastReport Core Open Source";
}
<div>
@await
ViewBag.WebReport.Render()
</div>
The Render method returns the HTML version of
the web report object.
Now you need to add one line to Startup.cs:
public void Configure(IApplicationBuilder app, IHostingEnvironment env)
{
…
app.UseFastReport();
…
}
The application is ready to be launched. Let’s start
it.
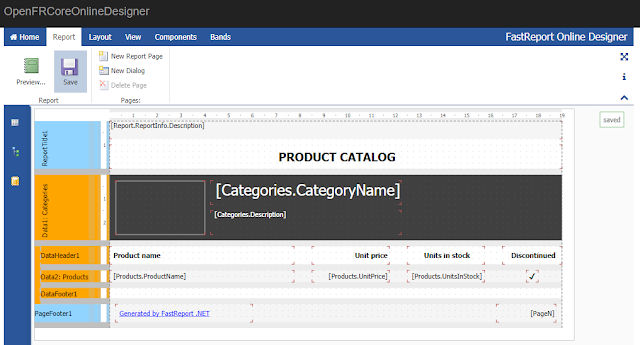
The online designer
is loaded with a report Master-Detail.frx. After editing the report, go to the
Report tab:
Here's the
main difference from FastReport.Core - just one export per preview.

You can
also save the report on the server using the Save button.
As you can
see, using an online designer with FastReport.OpenSource has no difference from
the same with FastReport.Core.


Comments
Post a Comment