How to make report viewer on WPF with FastReport Open Source. Part 2.
In the
first part of the article, we have implemented the report loading into the
Image object. This was done by exporting the report to png format. As a result of exporting the report, an image file is
generated, and if there are several pages in the report, then several files
will be created. We should delete the export files before opening another
report.
Add a method to delete export files:
public void DeleteTempFiles()
{
FileInfo[] path = new DirectoryInfo(Directory.GetCurrentDirectory()).GetFiles("test*", SearchOption.AllDirectories);
foreach (FileInfo file in path)
{
File.Delete(file.FullName);
}
pages.Clear();
}
Here we look for files with the name containing “test”
and delete them in a loop. And
also clear the list of files pages.
Recall the SetContent method, which exports the report
to png and sets an image in the Image object:
private void SetContent(Report report)
{
ex.ImageFormat = ImageExportFormat.Png;
ex.ResolutionX = 96;
ex.ResolutionY = 96;
ex.Export(report, Directory.GetCurrentDirectory()
+ "/test.png");
foreach (string file in ex.GeneratedFiles)
{
pages.Add(new BitmapImage(new Uri(file)));
}
im.Source = pages[0];
}
We will add
a call to the function to delete temporary files. But this is not the main
addition to this method. The fact is that we cannot delete files so easily.
With the current method of reading files for adding to the list, the files are
not released. Therefore, we will save them to the list of cache image files.
But there is a pitfall. If you generate files
with the same names each time you open another report, the cache will play a
cruel joke, and you will receive images that are cached firstly. Therefore, we
add a random number to the name of the temporary files. This is how the
SetContent method will transform:
private void SetContent(Report report)
{
DeleteTempFiles();
ex.ImageFormat = ImageExportFormat.Png;
ex.ResolutionX = 96;
ex.ResolutionY = 96;
Random rnd = new Random();
ex.Export(report, Directory.GetCurrentDirectory()
+ "/test." + rnd.Next(100) + ".png");
foreach (string file in ex.GeneratedFiles)
{
BitmapImage image = new BitmapImage();
image.BeginInit();
image.CacheOption = BitmapCacheOption.OnLoad;
image.UriSource = new Uri(file);
image.EndInit();
pages.Add(image);
}
CurrentPage = 0;
im.Source = pages[0];
}
As you can
see, inside the loop we now create an image cache and add it to the list. We
also set the CurrentPage variable to 0. This variable will allow you to track
the currently selected page. It will be useful to us in the future. Let's
declare it:
private int currentPage = 0;
public int CurrentPage
{
get { return currentPage; }
set {
if (value >= 0
&& value < pages.Count())
currentPage = value;
}
}
When assigning a value, we check that the page number
is not less than the number of report pages and is greater than or equal to 0.
In the page list there is a zero element, but in reality it is the first page.
It's time to implement switching between pages. For
these actions, we have as many as 4 buttons and a text field. Let's start with
the first button that returns to the first page of the report. Create an
OnClick event for it:
private void First_Click(object sender, RoutedEventArgs e)
{
CurrentPage = 0;
SetImage();
}
The current page is the first item in the list of
pages. The SetImage method allows you to load a picture into an Image object:
public void SetImage()
{
im.Source = pages[CurrentPage];
}
Here we simply assign an image from the list to the
Image object. By the way, since we have such a method, let's replace the string
im.Source = pages [0] in the SetContent method; on SetImage ();
The second button will allow you to move one page back:
private void Back_Click(object sender, RoutedEventArgs e)
{
CurrentPage--;
SetImage();
}
The third
button allows you to move to the next page:
private void Next_Click(object sender, RoutedEventArgs e)
{
CurrentPage++;
SetImage();
}
And the fourth - accordingly displays the last page of
the report:
private void Last_Click(object sender, RoutedEventArgs e)
{
CurrentPage = pages.Count() - 1;
SetImage();
}
In addition to the navigation buttons between pages,
we have a text field in which we can enter the page number or display the
current page number. To display the current page number, add a line to the
SetImage () method:
PageNumber.Text = (CurrentPage + 1).ToString();
Create an OnClick event handler for the text field:
private void
PageNumber_KeyDown(object sender, KeyEventArgs e)
{
if (e.Key == Key.Enter)
{
if (int.Parse(PageNumber.Text)
> 0)
{
CurrentPage = int.Parse(PageNumber.Text) - 1;
SetImage();
}
}
}
By pressing the Enter key, the specified report page
will be selected.
And now let's implement report scaling. First for the
zoom button:
private void
Zoom_in_Click(object sender, RoutedEventArgs e)
{
using (MemoryStream stream = new MemoryStream())
{
if (ex != null)
{
ex.ImageFormat = ImageExportFormat.Png;
ex.Resolution += 25;
ex.PageNumbers =
(CurrentPage + 1).ToString();
Report.Export(ex, stream);
if (CurrentPage >= 0 && CurrentPage <
pages.Count())
im.Source =
LoadImage(stream);
PageNumber.Text =
(CurrentPage + 1).ToString();
}
}
im.Width += 50;
im.Height += 50;
}
This time we will save the report export in the
stream, not in the file. In the export settings, specify the type of export png.
And also we increase the image resolution using the Resolution parameter. In
the export property PageNumbers specify the number of pages to be exported. In
our case, this is the current page. And at the end we increase the width and
height of the image. If we didn’t increase the resolution of the image at each
approximation, we would get a blurry image.
And to reduce the scale, we will not reduce the
resolution:
private void Zoom_out_Click(object sender, RoutedEventArgs e)
{
using (MemoryStream stream = new MemoryStream())
{
if (ex != null)
{
ex.ImageFormat = ImageExportFormat.Png;
ex.PageNumbers =
(CurrentPage + 1).ToString();
Report.Export(ex, stream);
if (CurrentPage >= 0 && CurrentPage <
pages.Count())
im.Source =
LoadImage(stream);
PageNumber.Text =
(CurrentPage + 1).ToString();
}
}
im.Width -= 50;
im.Height -= 50;
}
In order to go back to the original image scale when
moving between report pages, we will save the height and width during form
initialization and set these parameters every time when the SetImage ()
function is called:
private double imHeight;
private double imWidth;
public MainWindow()
{
InitializeComponent();
imHeight = im.Height;
imWidth =
im.Width;
}
Add the function of the image installation:
public void SetImage()
{
im.Source = pages[CurrentPage];
im.Height = imHeight;
im.Width = imWidth;
PageNumber.Text = (CurrentPage + 1).ToString();
}
Now it is
time to run the application:

Let's load
the report. Click on the file open icon. And select a report.
Here is
the first report page:

Enter the
page number in the text field and press Enter. And we can see the selected
page:

When you
switch between pages using buttons, you see the number of the current page in
the text box. And now let's bring the page closer by pressing the "+"
button several times: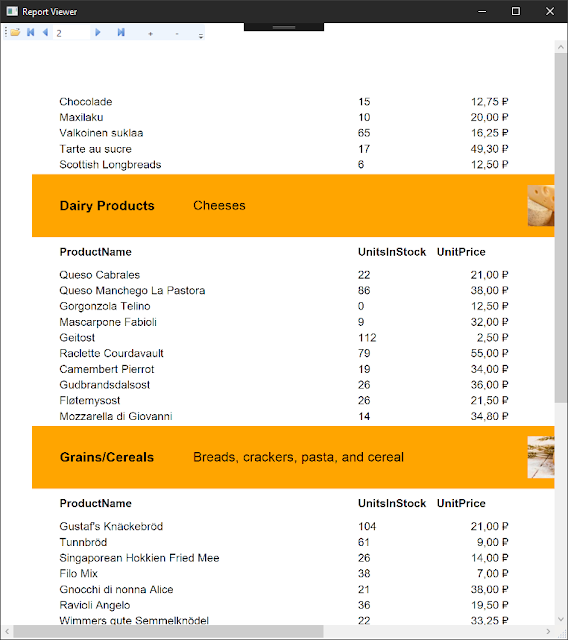

And scale
down using the "-" button:

That's
all. As you can see, FastReport Open Source can be quite successfully used in
WPF projects, despite the meager assortment of export formats.


Comments
Post a Comment